Week 7: Computer-Controlled Machining
Assignment:
- Make something big on a CNC machine.
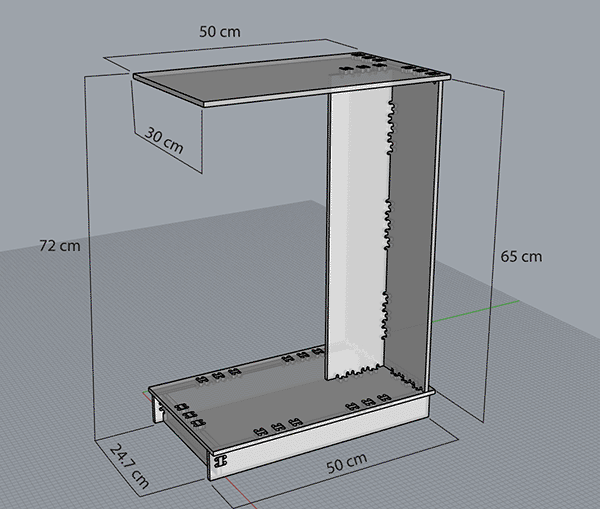
My goal for this assignment is to design and cut a laptop C table to work in my living room coach because I live in a small apartment and I don’t have a studio or something similar, I used to work in the dining table but is quite of uncomfortable because the table is round, so I look over internet to find a sample to work with.
A computer numerically controlled router (CNC Router) is a machine that uses a cutting drill that rotates and remove material, it could be etching or cutting.
The machine can moves in 3 axes (X, Y & Z), thats why some times they are also called three-axis CNC router.
The materials to use could be MDF, plywood, wood, foam, plastic and soft metals like aluminium.
For this assignment I work with 9 mm MDF to design and construct a laptop C table using as inspiration an Ana White DIY design.
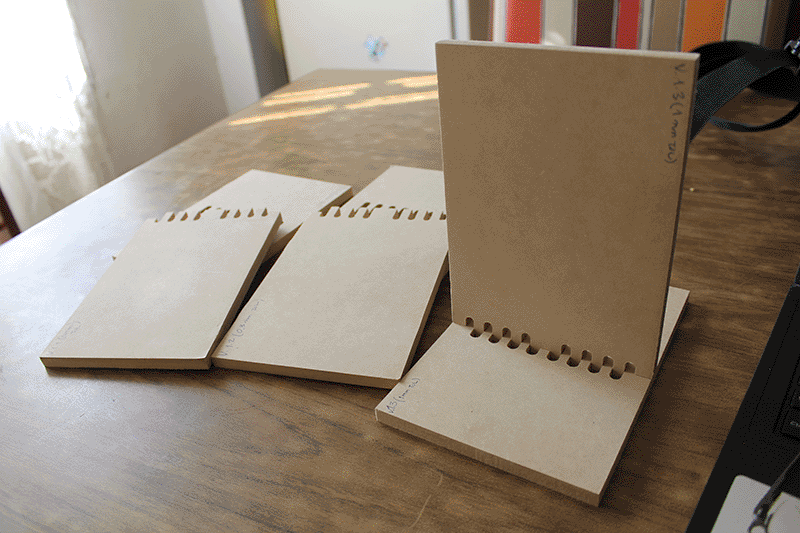
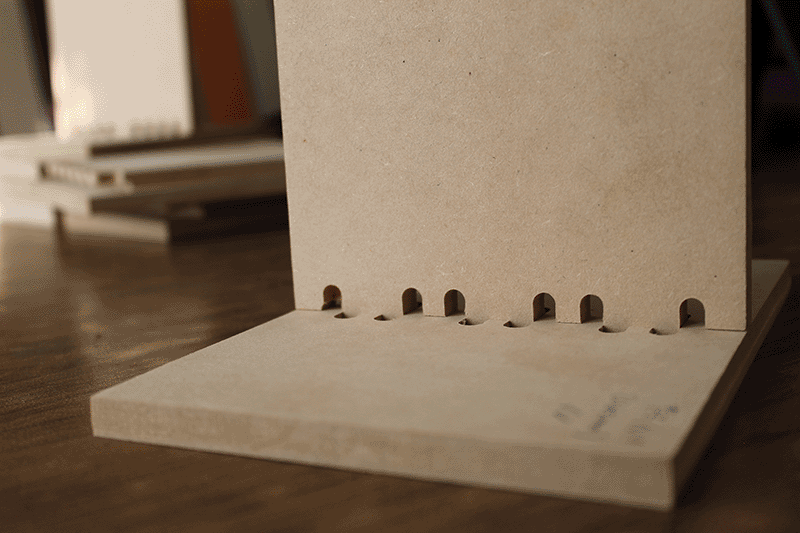
First as a group, we start to test some joints to check if they fit right and be able to use it in our personal designs. To do that we have a file with several joints kinds but they were designed to cut on a 12 mm material. We choose three, and the router operator said he’ll use a 1/4” (6.35 mm) drill, so we have to modify the original file because some spaces between joints were narrow and it would be imposible for the router to preserve the desire measurements, thats why we change the dimensions of the test cuts to avoid the risk of the joints not to fit well.
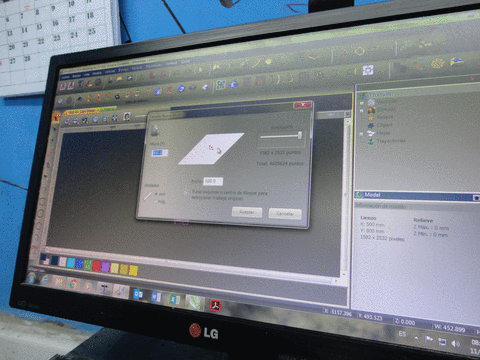
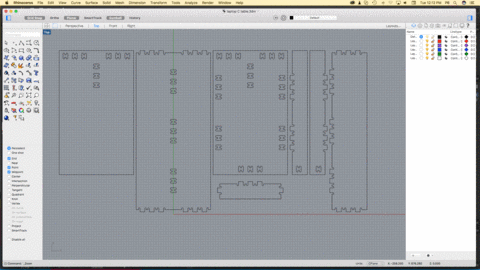
The Illustrator file should be saved as PDF or EPS to import it in ArtCam and set all the parameters to generate the Gcode, then the code file is send via printer driver to NCStudio AD which is the software that controls the ZK-6090, the maximum cut area for this router CNC is 600 x 900 mm.
In ArtCam we select an engraving of 4.5 mm in each part of the flat joint.
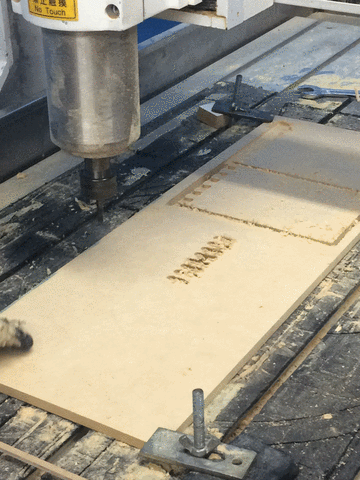
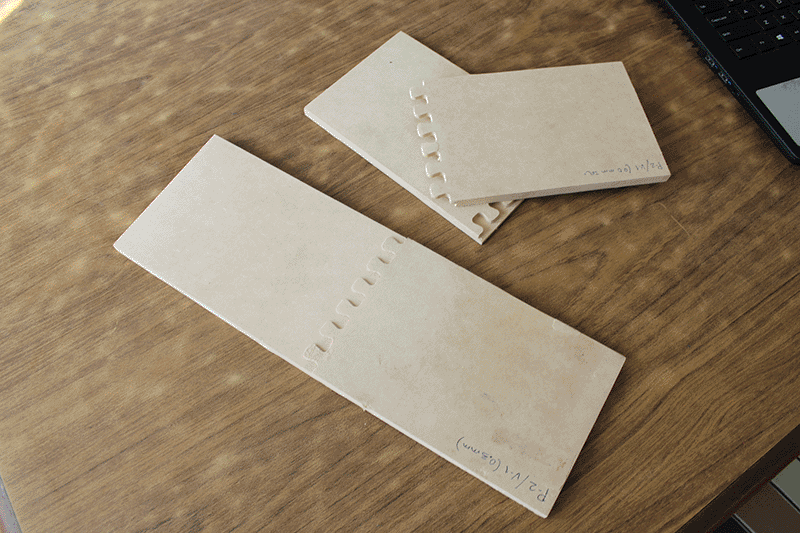
In the cutting test #1, the pins and holes of joints were exactly 9 mm, but they don’t fit, we should change the file again.
Now we decided to change just the female joint part and leave the male as the original. We modify the holes made them 1 mm wider than the original to do the test #2, the result: the flat joint worked perfectly, but the T joint was a little loose.
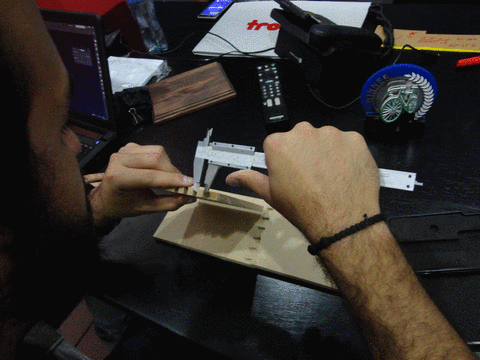
The cutting test #3 was just using two different T joints modifying the female part making it 0.65 mm wider than original and the result: they fit perfectly!
Finishing the cutting test, I decide to start my laptop C table design. is the result:
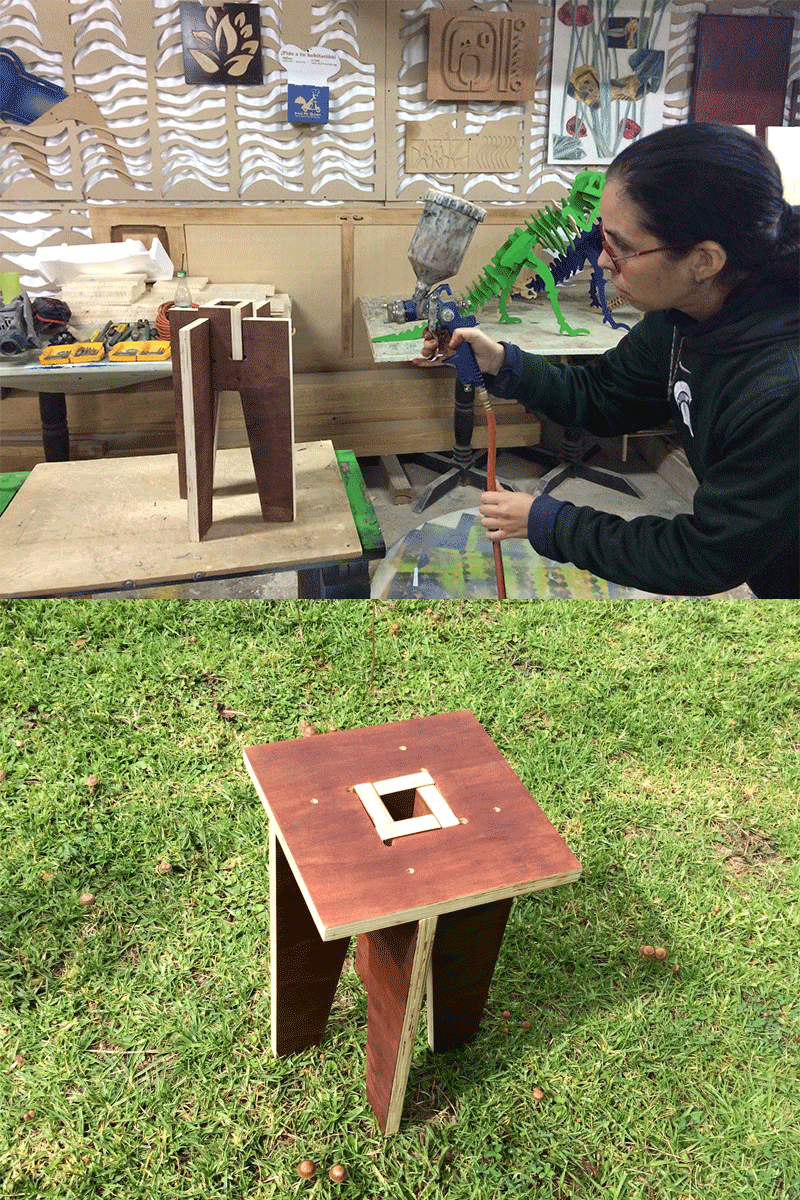
I had to travel to Guatemala to La Granja Fab Lab to cut my furniture file, but I wasn't able to do the C table I designed because I traveled in auto bus and I can't carry the table with me, so I decided to cut a little stool they already have the file, this stool is originally downloaded from Open Desk, but now is not available in the web. I import the cutting file in Rhinoceros 5.
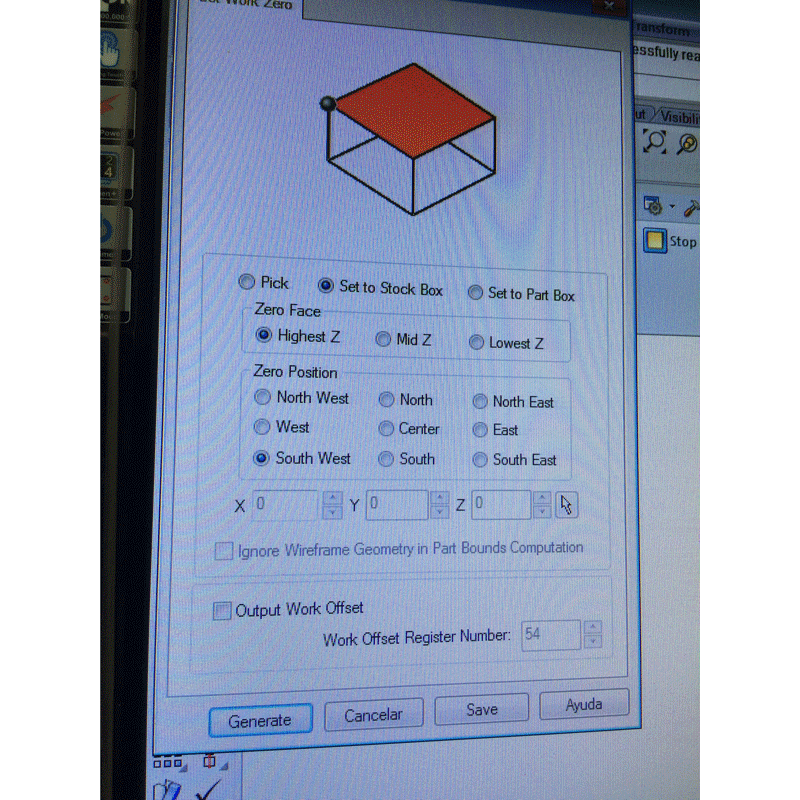
Once I had the Rhino file, I opened it in Rhino CAM, this software is used to generate the GCode setting first the drill size, in this case is 12 mm because i used 3/4" Plywood. I had to set the Zero face in highest Z and Zero position in south west. I also set the way the dril is going to take contact with the material, in this case is tangent.
At the end Rhino CAM shows the cutting time and generates the GCode.
Having the GCode generated, I opened it in Mach3 CNC Controller to send the file to cut setting the X, Y and Z axes to cero, but first I had to fix the plywood shet to the routers bed with some screws.
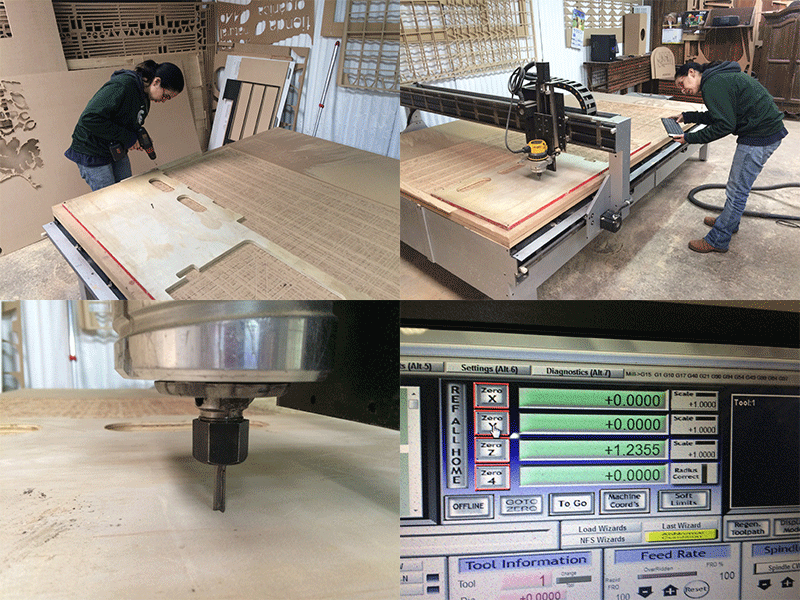
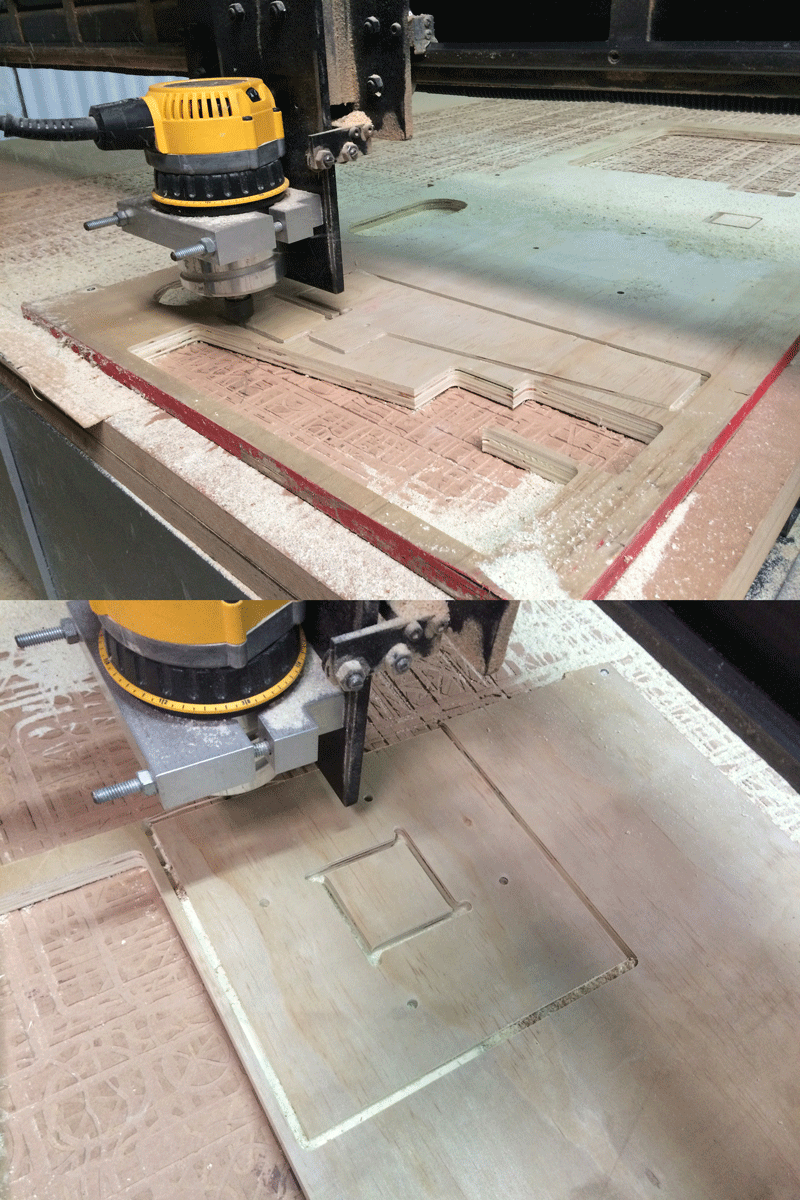
As soon as I click on the "Cycle Start" button, the router CNC starts.
Computer Controlled Machining - Mach3 CNC Controller from Damaris Cotto on Vimeo.
Computer Controlled Machining - Cutting (Part 1) from Damaris Cotto on Vimeo.
Computer Controlled Machining - Cutting (Part 2) from Damaris Cotto on Vimeo.
When finished I took the pieces out and I had to sand the edges, then I started to join the stool.
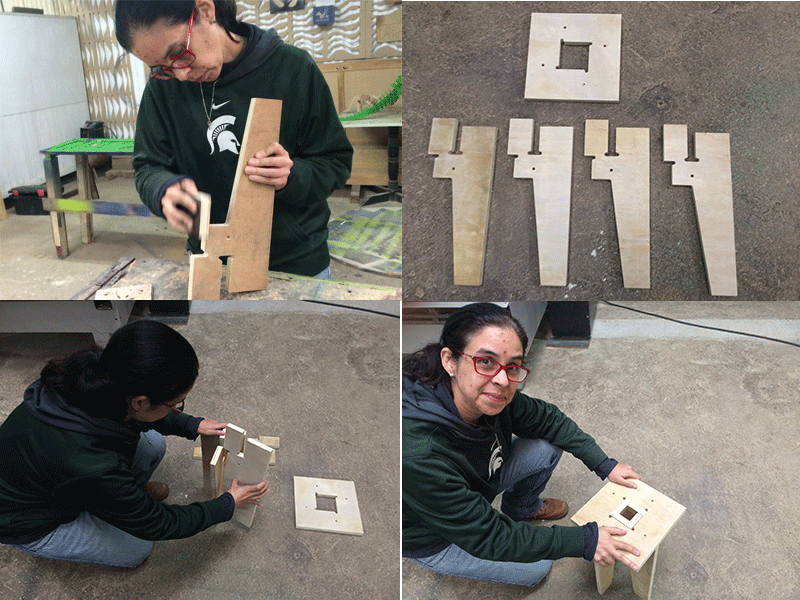
As a bonus, one of the La Granja Fab Lab staff member taught me how to apply dye and fixative. Here is the final result.
This assigment was sponsored by: